

Kevin Merchant Photography Articles |
Photoshop Layer Mask Refinement |
This short article describes a Photoshop tip for refining a layer mask using an additional layer filled with 50% gray. It is assumed that you are already familiar with layers and layer masks. |
|
February, 2013
One thing I know for certain about Photoshop is that you can never know everything about it. In fact, it is sometimes hard to find out even the simplest things. For instance, while I was writing this very article, I had a suspicion that there was a way to do what I needed, but I could not figure it out. And by accident one day, I did. After you have created a layer with the mask, you can, at anytime, see what has been painted in the mask, by holding down the ALT key (Windows) and clicking on the desired mask icon in the Layers panel. To toggle it off, ALT click again. |
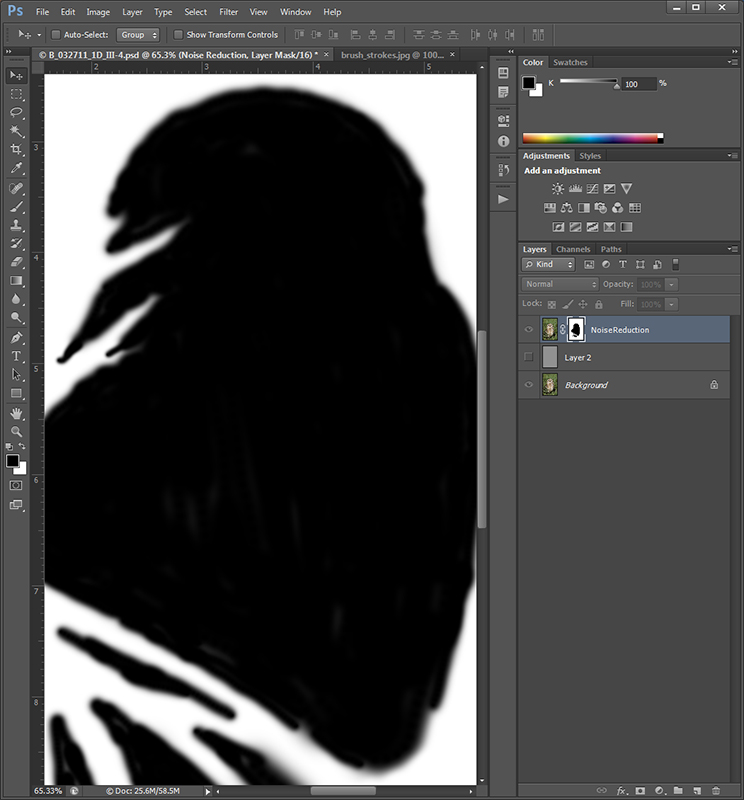 Brush Strokes Revealed |
|
As you might expect, I also discovered something else - a gray layer didn't reveal all of the mask defects as well as black does. So below, you can see an improved mask refined using the Photoshop feature. |
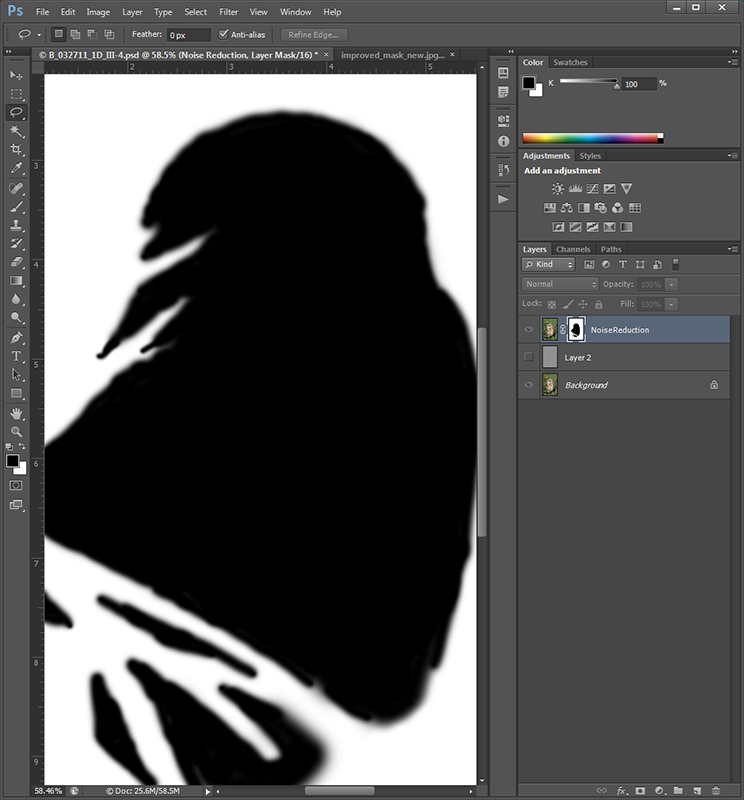 Improved Layer Mask |
|
I hope you find this useful. |
|
November, 2011
Photoshop layer masks have become a very important part of my image workflow. Especially with wildlife shots where I'm fighting the effects of noise due to using high ISO settings in order to maintain fast shutter speeds. I don't typically want to apply noise reduction to the entire image because too much detail is lost in the subject, but with an out-of-focus background losing detail is perfectly okay. So, in a case like this, a layer mask can be used on the layer where the noise has been reduced. The mask is painted to show only areas where you want to see the noise reduced. |
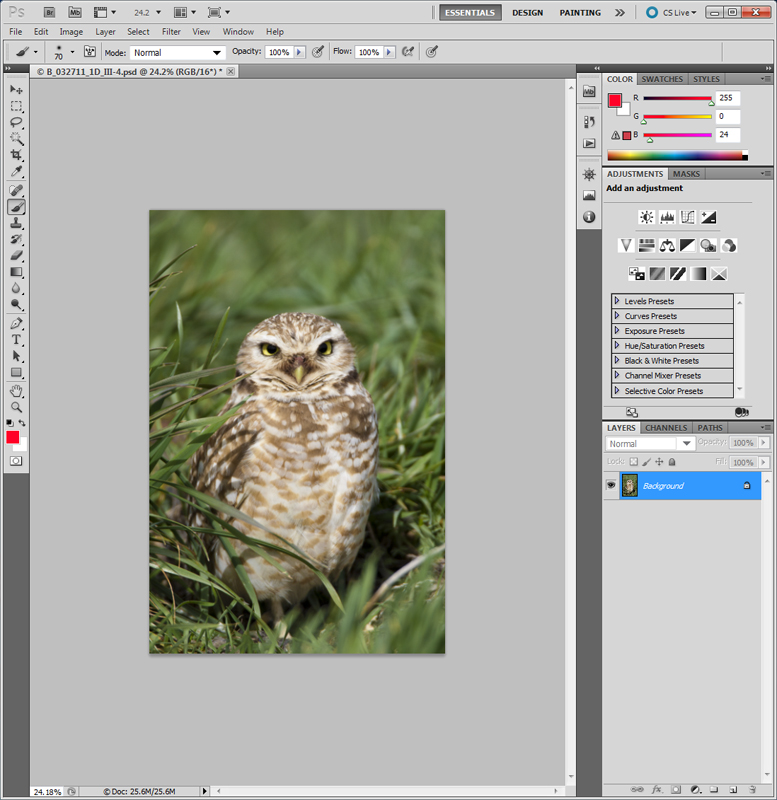 Master Image |
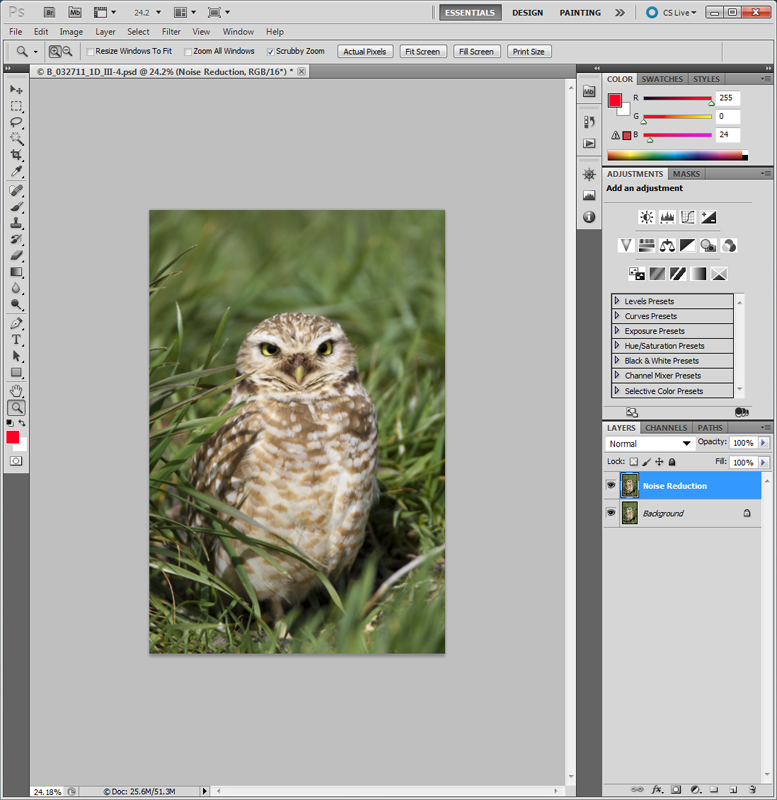 Noise Reduction Layer |
|
If you have ever used layer masks, you know how difficult it is to tell where you have and have not painted in the mask. In a case like noise reduction where you are acting on a copy of the image (it should be a copy, otherwise this method won't work), you can turn off the original image layer which sits below the working layer. This allows you to see each brush stroke where you are painting because a portion of the image disappears. |
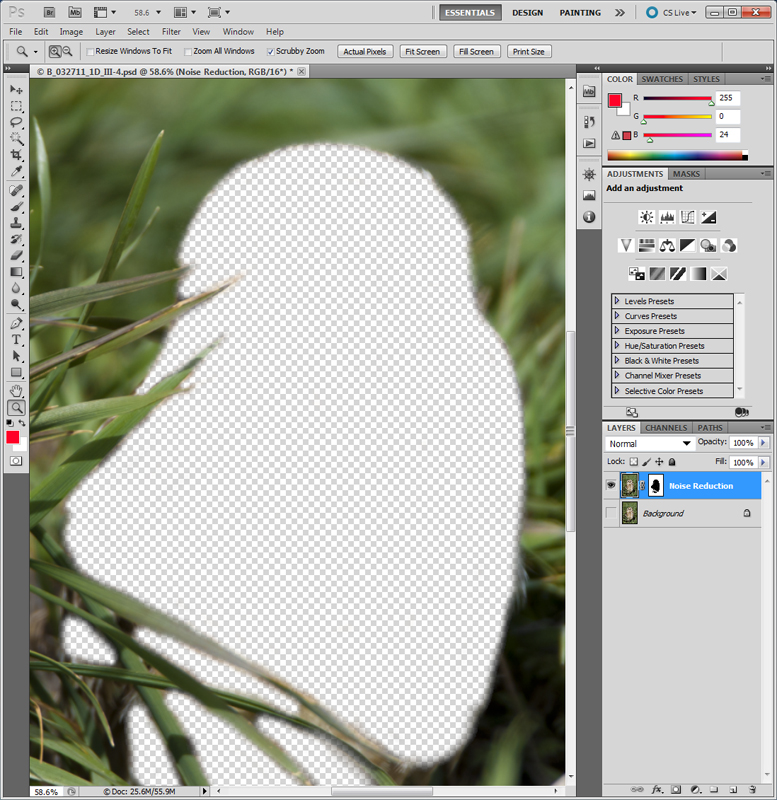 Master Image Turned Off |
|
From the above image, it appears we have a layer mask that works really well. You don't see any artifacts from the use of the brush tool with missed areas. With this method I was fairly confident that I had created a good working layer mask. However, I had an occasion where I created a 50% gray layer below a noise reduction layer and noticed how poorly my brush strokes had actually been. Mind you, this was by accident that I could see all of these brush stroke artifacts, thus discovering another step needed in my workflow. |
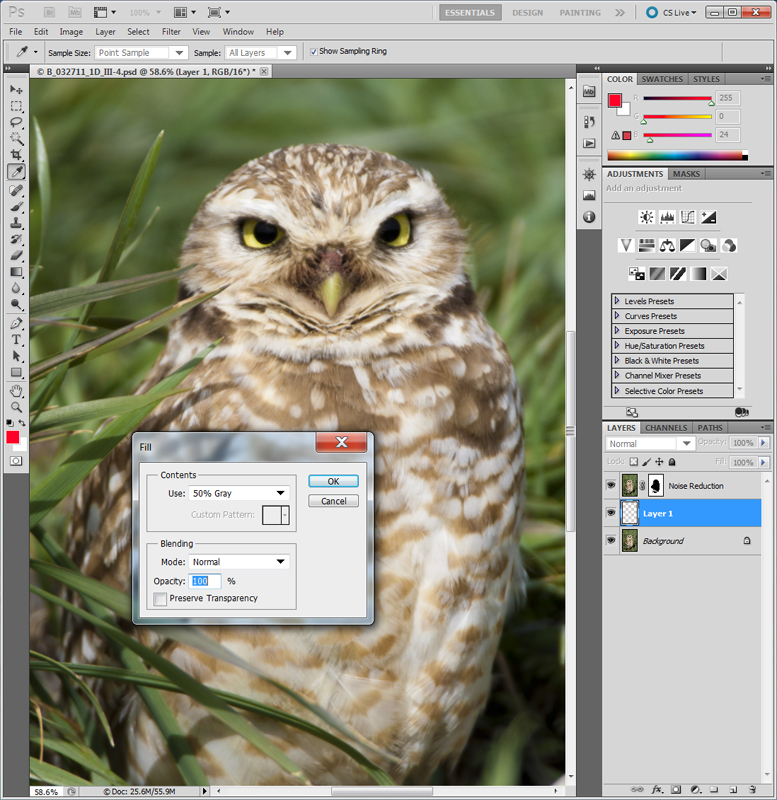 Creating Gray Layer |
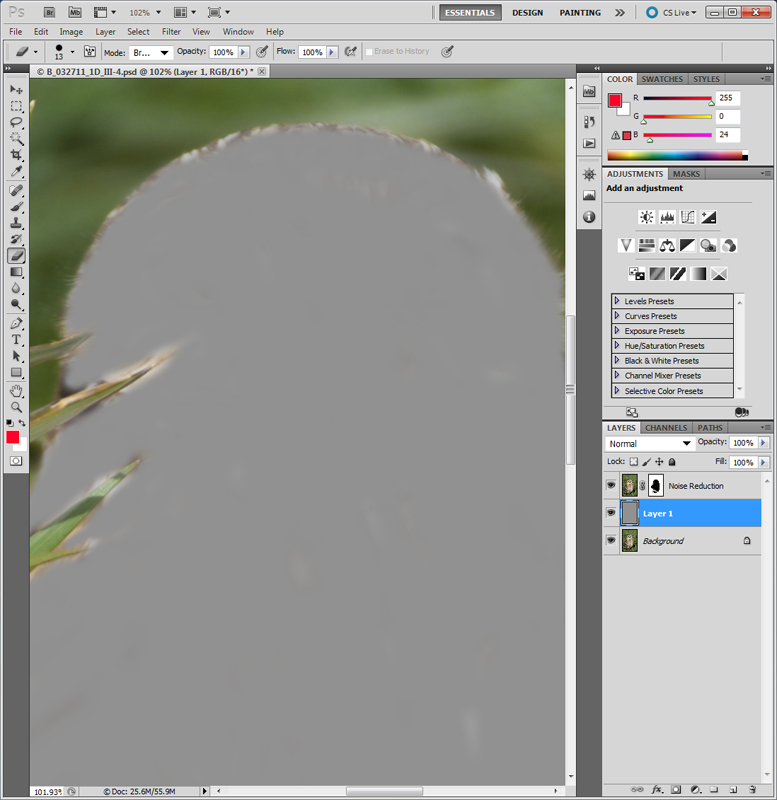 Brush Strokes Revealed |
|
With this gray layer turned on, I was able to go back to the noise layer and do more painting on the mask to improve it. This has now become a standard practice for painting layer masks. To make the brush stroke artifacts stand out more, you can make the layer a darker gray. You might even want to create an action for this step to save a little bit of repetitive movement as well as time. |
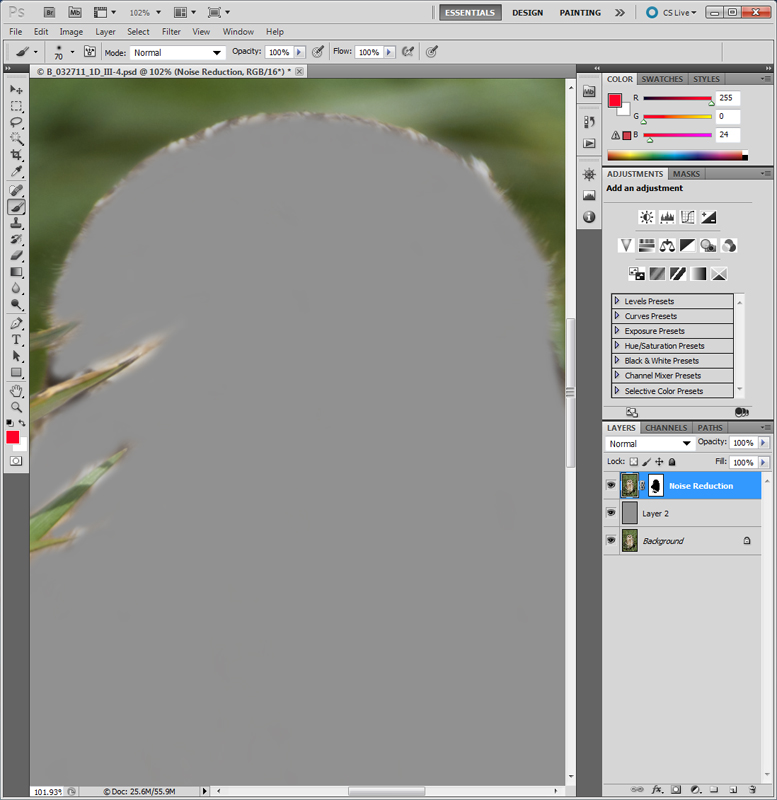 Improved Layer Mask |
|
Once the layer mask has been re-touched, the gray layer can be turned off (what I do) or deleted altogether since it is a temporary tool for improving the mask. Now you're ready to continue with any other adjustments the image needs. |
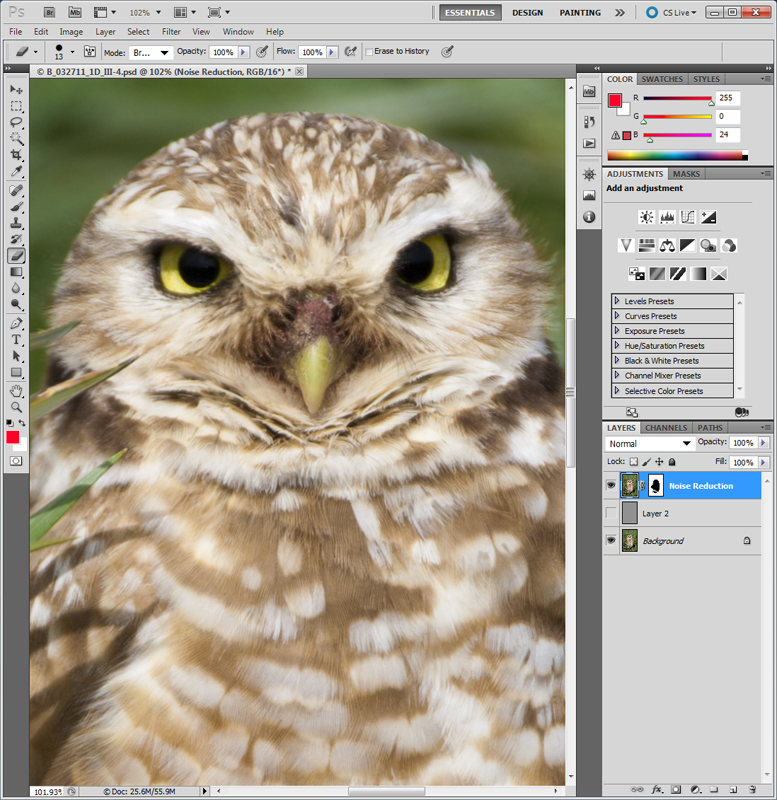 Gray Layer Off |
|
Why, you ask, is this a big deal? For what you are seeing here on this web site, it makes no visible difference. And, you could argue that it probably makes no difference in small prints. But in cases where I'm making strong adjustments such as noise reduction, I want to make every effort to preserve as much detail as I possibly can. In larger prints lost detail becomes more evident. This method helps me to preserve that detail. As an aside to this tip, here's another one - if you do as much layer mask painting as I do and you are using a mouse to do all your painting, do yourself a favor and get a Wacom touch sensitive tablet. Your accuracy will go up and your frustration level will go down. I use the Wacom Bamboo CTH460 model. It has a 3.5" x 6" active area. There are larger models, which I'm sure give better control, but the trade-off is that they require more real estate on the desktop and they are a lot more expensive. This one is very economical and well worth the investment. In addition to these devices providing a more natural approach to painting, they are also pressure sensitive so you can apply more or less pressure to affect the strength of each stroke. This becomes more apparent when you are using a feathered brush - it affects how much feathering is applied. There is a reason these devices were invented and still in popular use. Happy painting! |
| Let me know if you find this article useful. Also, let me know if you have questions or comments. |
| Thanks for stopping by and be sure to check out the NEW section of the GALLERY for the occasional update. |
|
Resources: |
| © KEVIN MERCHANT PHOTOGRAPHY |
|
All photographs appearing on this site are Copyrighted
property of Kevin Merchant Photography and are protected under United States and
international copyright laws and have been registered with the U.S. Copyright Office. Contact Kevin Merchant Photography for licensing terms of all photographs appearing on this site. |