

Kevin Merchant Photography Articles |
Puppet Warp - what is it and why would you use it? |
This short article describes a Photoshop tip for correcting the horizon of a panorama using Photoshop Puppet Warp. It is assumed that you are already familiar with techniques involved with producing a panoramic series of images. |
|
March, 2012
Puppet Warp is a feature that was introduced in Photoshop CS5. What does it do? Well, Adobe describes it as "a visual mesh that lets you drastically distort specific image areas, while leaving other areas intact". In fact, this tool has the ability to be used in ways that probably helped Photoshop earn the phrase "that's been Photoshopped". Only now, Photoshop has the ability to allow a user to manipulate such that it is much more difficult, if not impossible, to tell that an image has been "Photoshopped". What exactly do I mean? Well, here's a fanciful use - imagine an image of a person with their arms down at their side but you would really like to have them waving one arm. With a selection to isolate the person from the background and the setting of a few "push-pins" you can move one arm into a waving position. Depending on the image the result can be very believable. However, I am much more interested in the natural history of a scene or wildlife. This would not be an acceptable use of Puppet Warp. But I have come across a use that I believe is acceptable and makes great use of this tool. It is no secret that I've been caught up with the fascination of panoramas since I first picked up a digital camera and saw the possibilities for panoramics. Sometimes the process of aligning and blending a series of images into a panorama results in a curved horizon. This becomes more pronounced when using a focal length that approaches wide angle and you don't place the horizon smack dab in the center of the composition. If the horizon is not visible this is not so much a problem. But when the horizon is visible the result can really be a distraction in the final image. Before Puppet Warp, the Filter > Lens Correction pincushion control could be used to make some corrections. But in some cases the result was unsatisfactory due to elements at either end of the panorama becoming distorted. Recently I was working on some images where this was the case. I wondered if this silly named feature might help. So I began experimenting and found this to be a very acceptable solution to a problem introduced by the optical distortion of the lens used to capture the series of images. And, it is a very efficient method. Once you have the panoramic image assembled, the resulting blended image will have layers each containing a mask. These layers need to be combined into a single layer. I use the Layer > Merge Visible selection. Now you are ready to begin. First, use the Ruler Tool to create a selection for an Arbitrary Image Rotation to get the horizon on either side of the panorama to be lined up based on the Ruler Tool selection. Zoom in to make fine adjustments at either end of the Ruler Tool selection. Now select Image > Image Rotation > Arbitrary and click OK. By the way, this is a very quick way to make any horizon level. |
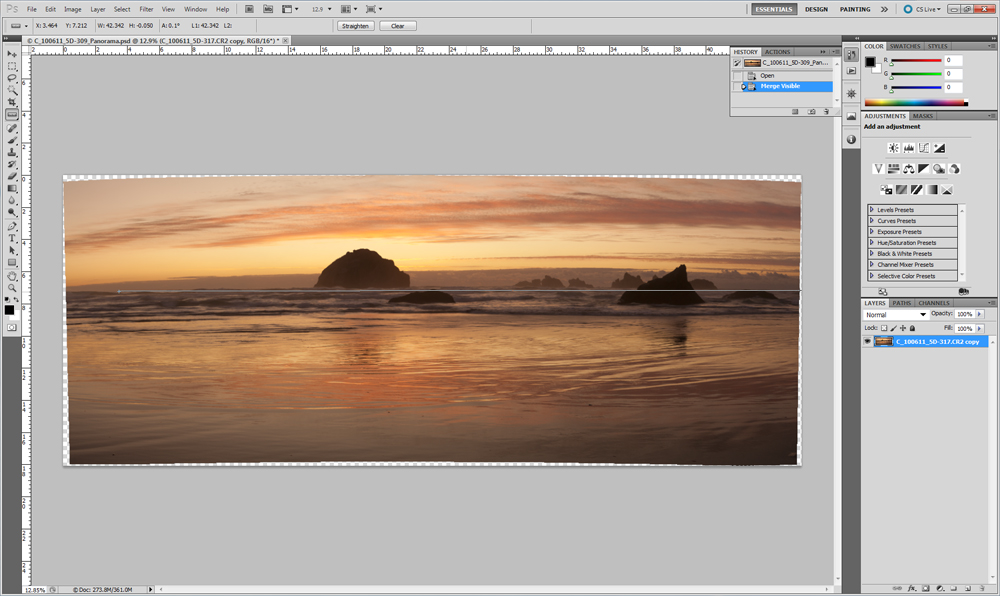 Ruler Tool Selection |
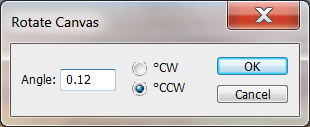 Arbitrary Image Rotation |
|
Next, place a horizontal Guide Rule where you want the horizon to end up and place a vertical Guide Rule near the center of the panorama where you judge the curvature to be at its peak. |
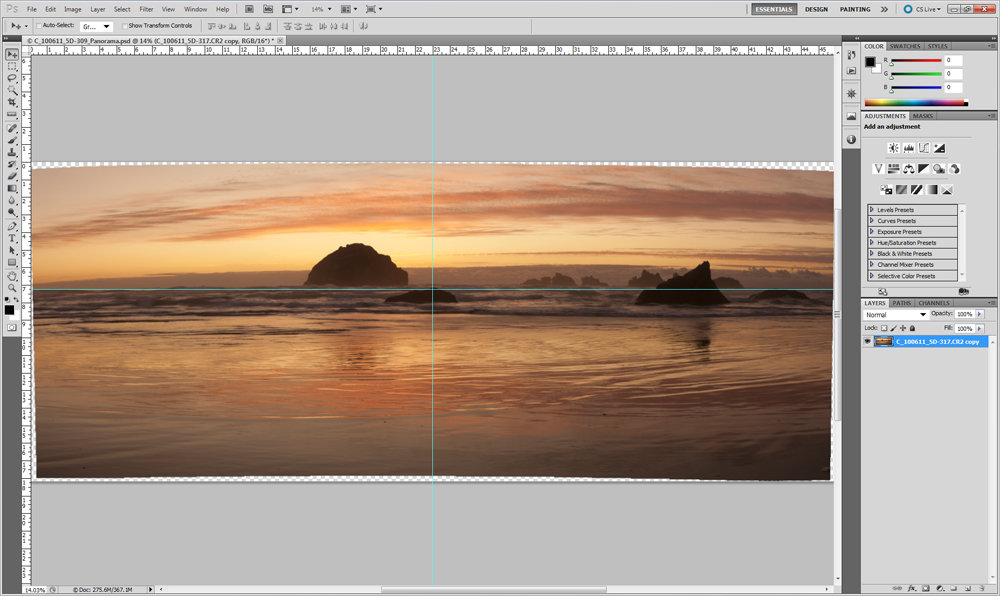 Guide Rules |
|
Now you're ready to enter Puppet Warp mode from the Edit menu. Start by placing push-pins at either end of the panorama where the horizontal Guide Rule was placed. These will anchor the ends so they don't move. Next, place a push-pin in the center, on the vertical Guide Rule, right on the horizon. Drag the center push-pin to where the vertical Guide Rule intersects the horizontal Guide Rule. To complete the process, click the Check Mark. This may be all you need. But, in some cases where the panorama is extra wide you may need to make a similar adjustment to both halves. For cases like this you need to place all of the Guide Rules before entering Puppet Warp mode. |
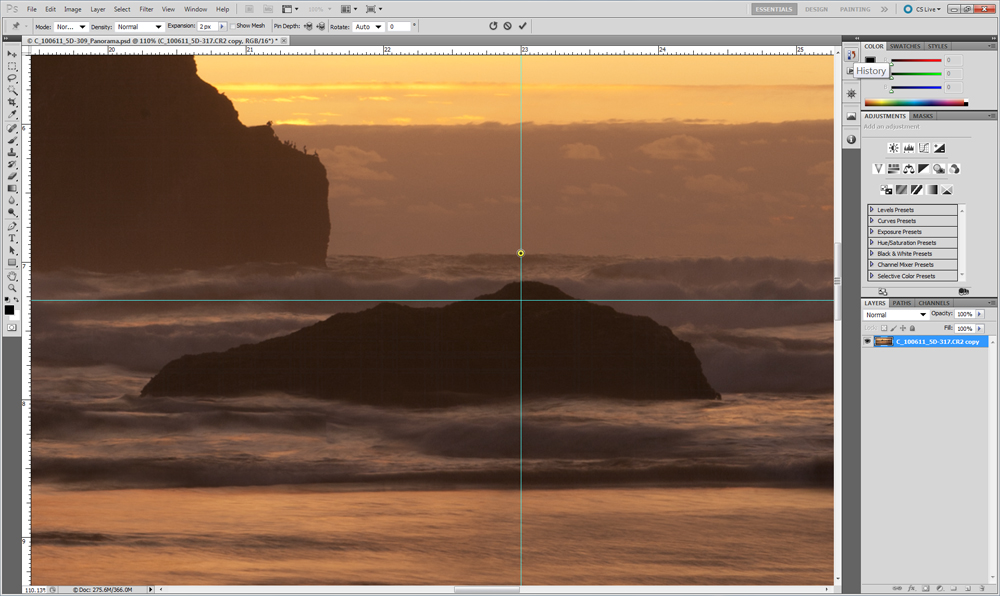 Center Push-Pin - Before |
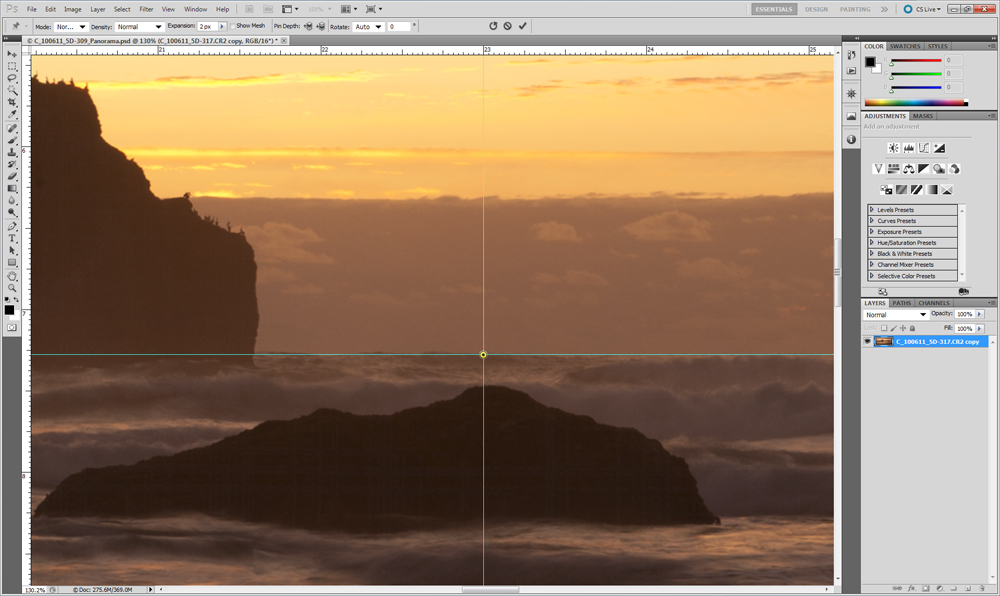 Center Push-Pin - After |
|
After you see how to use Puppet Warp effectively, you may start to see other uses where it can be used, without going over the boundaries of a natural history image. Sometimes when producing a panoramic, near foreground objects can have a similar distortion that needs correcting such as the example of this log cabin. The same technique is used where you anchor the ends of what needs straightened and then drag the center towards being straightened. You may have to be creative in making a guide line if the distortion is not on a horizontal or vertical axis. Or just eyeball it (that's a technical term I learned from my carpenter father). As long as nothing else in the image becomes noticeably distorted this is a great correction technique for producing an image that would most likely not be as useful. Sometimes these sorts of extreme distortion can work but for a natural history image I prefer to not have them. |
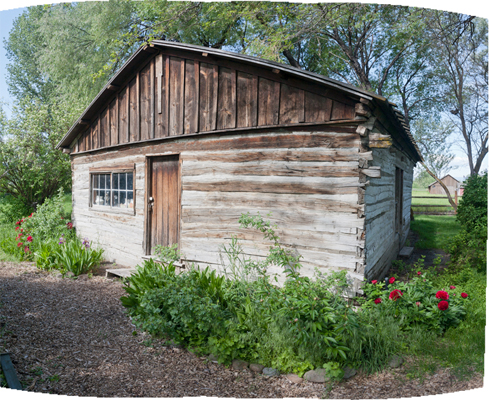 Log Cabin - Before |
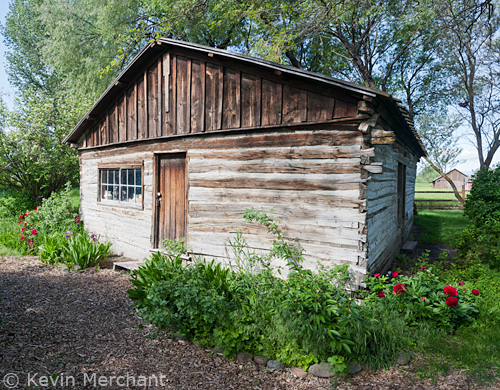 Log Cabin - After |
|
Just like the Crop Tool, the Esc key quickly gets you out of Puppet Warp mode. These are two recent cases where I have been able to effectively use Puppet Warp to improve images. I'm sure there are others. |
| Happy shooting and let me know if you find this article useful. Also, let me know if you have questions or comments. |
| Thanks for stopping by and be sure to check out the NEW section of the GALLERY for the occasional update. |
|
Resources: |
| © KEVIN MERCHANT PHOTOGRAPHY |
|
All photographs appearing on this site are Copyrighted
property of Kevin Merchant Photography and are protected under United States and
international copyright laws and have been registered with the U.S. Copyright Office. Contact Kevin Merchant Photography for licensing terms of all photographs appearing on this site. |